Transform Your Bathroom: The Ultimate Guide to Painting Toilet Seat Covers
Are you tired of your plain and boring toilet seat cover? Have you been thinking about updating the look of your bathroom but don’t want to spend a lot of money? Painting your toilet seat cover might just be the solution you’ve been looking for.
Yes, you heard that right – painting a toilet seat cover is possible and can give your bathroom a fresh new look without breaking the bank. But before you grab your paintbrush and start painting, there are some important things to consider.
You’ll need to choose the right type of paint and supplies, properly prepare the surface, and follow some key steps in order to achieve a professional-looking finish. In this article, we’ll guide you through the process of painting a toilet seat cover step-by-step so that you can successfully update the look of your bathroom on a budget.
Preparing Your Toilet Seat Cover for Painting
Get your toilet seat ready for a colorful makeover by preparing it properly before painting. Begin by thoroughly cleaning the seat with trisodium phosphate cleanser and a coarse plastic brush. Rinse it with water and dry it completely using a towel or air-drying method.
Next, use 120-grit sandpaper to roughen up the surface of the toilet seat, ensuring that the paint will adhere well. Before painting, protect yourself by wearing gloves and a mask to avoid inhaling any fumes or particles.
If there are any pre-painting repairs needed, such as cracks or chips in the plastic, address those first before proceeding with painting. Consider stenciling options for added design elements and think about whether you prefer a glossy or matte paint finish.
Additionally, research brand recommendations and weigh spray versus brush application methods to determine what works best for your needs. Lastly, review sanding techniques and troubleshooting tips if you encounter any issues during the process.
Transitioning into choosing the right paint and supplies is crucial to ensure that your painted toilet seat cover lasts for years to come without chipping or peeling off prematurely.
Choosing the Right Paint and Supplies
Picking the perfect paint for your porcelain throne’s lid can be a tricky task, but finding the right materials is like hitting the bullseye on a dart board—it just takes precision and aim.
Here are some things to consider when selecting paint for your toilet seat cover:
- Choose a high-quality, durable paint that’s designed for use on plastic or wood surfaces.
- Use a spray gun, brush, or roller that suits your painting skill level and experience.
- Clean and sand the surface of the toilet seat cover to ensure good adhesion of the new coat of paint.
- Select colors based on personal preference, style preferences, and decor themes in your bathroom.
- Take into consideration drying time, topcoat application, gloss level, paint durability, safety precautions, and maintenance tips.
With these considerations in mind, you’ll have an easier time choosing the right materials for painting your toilet seat cover. Once you’ve finished painting and allowed sufficient drying time as per manufacturer instructions, you can move onto removing it from its hinges.
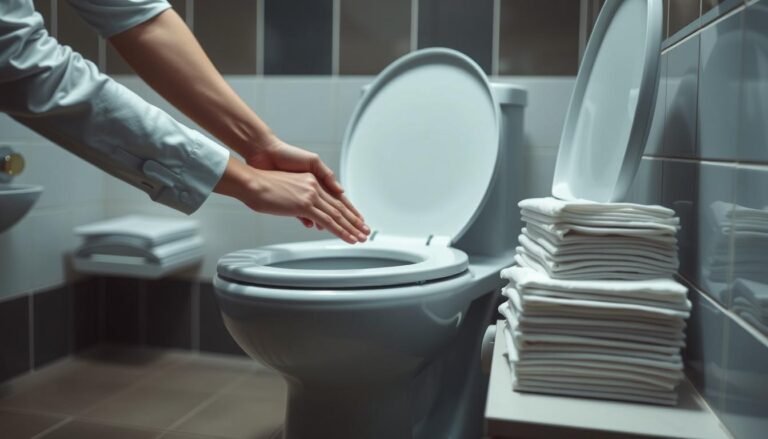
Removing the Toilet Seat Cover
Now it’s time to take off that lid and give your throne a fresh new look. Before you begin, make sure you have the right tools for the job. You’ll need a screwdriver to remove the bolts holding the seat in place. If you’re having trouble, try using some penetrating oil to loosen them up.
Once you’ve removed the seat cover, inspect it for any stains or damage. Removing stains can be tricky depending on what caused them. Proper disinfection is important before painting, so use bleach or another disinfectant to kill any germs or bacteria that may be lingering on the surface.
If your toilet seat is damaged beyond repair, consider purchasing replacement parts instead of repainting it. If all looks good, then proceed with color matching and eco-friendly paint options. Get creative with stenciling or adding texture for a unique touch! Just remember to always follow safety precautions when working with paints and chemicals.
Before painting though, cleaning the surface is crucial.
Cleaning the Surface
Time to give your throne a fresh new look by properly disinfecting and cleaning the surface of the toilet seat before you start your painting project. Here are some cleaning tips to ensure a successful paint job:
- Use trisodium phosphate cleanser and a coarse plastic brush to thoroughly clean the toilet seat. This will remove any dirt, grime, or bacteria that may interfere with the paint’s adhesion.
- Dry the toilet seat completely after rinsing it with water. You can also use rubbing alcohol or acetone to remove any remaining residue.
- Wear gloves and a mask when using chemicals for cleaning.
Once you have cleaned and disinfected the surface, it’s time to select your paint options, color choices, stencil designs and topcoat options. Follow manufacturer instructions for application techniques and drying techniques.
Now that your surface is clean and prepped, sanding is up next!
Sanding the Surface for Better Adhesion
To ensure better adhesion of the paint, roughening up the surface of your throne with 120-grit sandpaper is recommended and can increase the durability of the painted surface by 60%. Using sandpaper before painting is considered an effective adhesion technique that helps paint stick better to surfaces. Sanding creates a rougher texture on the toilet seat, which makes it easier for paint to adhere. This process also eliminates any gloss or shine that might prevent primer and paint from sticking.
Here are some tips to keep in mind when sanding your toilet seat cover for painting. First, use fine-grit sandpaper to avoid damaging or scratching your seat’s surface too much. Second, make sure you remove all dust particles from the seat after sanding. Finally, always wear gloves and protective glasses during this process to prevent injury or irritation. Remember that proper surface preparation is essential for achieving a smooth and long-lasting painted finish on your toilet seat cover. Once you have finished sanding, move onto applying primer for a smooth finish.
Applying Primer for a Smooth Finish
Achieving a smooth and long-lasting painted finish on your throne requires proper surface preparation, including applying primer for a flawless result. Here are some tips for priming your toilet seat cover:
- Choose the right type of primer: Look for a high-quality acrylic latex spray primer that’s compatible with the paint you plan to use.
- Apply in thin coats: Use a brush or roller to apply the primer evenly across the surface of the toilet seat. Avoid drips and thick spots by working slowly and carefully.
- Follow drying times: Allow each coat of primer to dry completely before adding another layer or moving onto painting. This will ensure that the final result looks professional.
It’s important to note that using a spray can be more convenient than using a brush, but it may require more ventilation due to fumes. Additionally, sanding technique and any troubleshooting issues should be addressed prior to priming.
Once your toilet seat cover has been primed correctly, you’re ready to move onto painting! Remember that proper surface preparation is key for achieving great results when painting your toilet seat cover. With these tips for priming, you’ll have an excellent foundation for adding color or patterns with paint.
Painting Your Toilet Seat Cover
Get ready to add some color and personality to your throne by transforming its lid with a fresh coat of paint! Painting your toilet seat cover is a great way to give your bathroom decor a personalized touch while sticking to budget-friendly ideas.
With various color options available, you can choose a shade that will complement the overall theme of your bathroom. If you’re feeling particularly creative, try adding unique patterns or designs for an artistic inspiration that will make your toilet seat cover stand out.
Before diving into this DIY project, keep in mind some painting tips that’ll guarantee a smooth finish. Make sure to properly clean and sand the surface before applying any paint. Choose eco-friendly options such as low VOC paints if possible, and follow manufacturer’s instructions for application and drying times.
Once you’ve painted your toilet seat cover, allow it to dry completely before reattaching it to the bowl. Now that you know how easy and fun it is to paint your toilet seat cover, why not take it up a notch by adding designs or patterns?
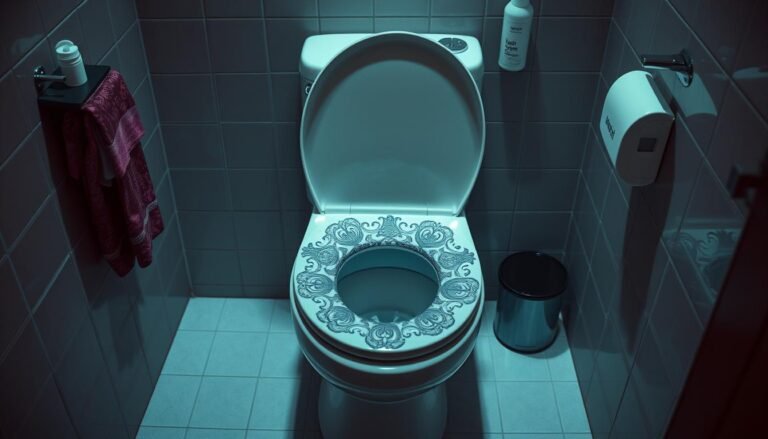
Adding Designs or Patterns
Ready to give your bathroom a unique touch? Transform your throne with personalized designs and patterns on your freshly painted lid!
With a little creative inspiration, color combinations, and some DIY paint designs, you can make your toilet seat cover stand out. Stenciling techniques are an easy way to achieve precise shapes or lettering. Masking options allow for clean lines and geometric designs. Freehand painting tips can add a personal touch with swirls, dots, or stripes.
Texture and finishes like gloss or matte can also enhance the overall look of your design. Consider adding embellishments such as rhinestones or beads for added flair. Decoupage ideas using printed images or scrapbook paper can create a unique collage effect. And if you’re feeling bold, try using spray paint for a quicker application.
Once you’ve finished adding your design elements, it’s time to seal the paint for durability in the next step.
Sealing the Paint for Durability
Make sure your unique design on the newly painted toilet seat is protected and long-lasting by sealing it with a protective coating. After you’ve painted the toilet seat, wait for it to dry completely before applying any topcoat options.
There are different sealing techniques available depending on the finish you want. You can choose between glossy vs matte finishes, which will give your toilet seat cover a distinct look. A clear coat will not only add shine but also weather resistance and scratch proofing.
When choosing your protective coating, consider maintenance requirements and durability solutions that best suit your needs. Applying a topcoat will add an extra layer of protection to ensure long-lasting results. Once you’ve applied the sealant, let it dry completely before reattaching the toilet seat cover.
This finishing touch will make sure that your hard work painting the toilet seat cover won’t go to waste and will impress anyone who sees it! Now that you’ve sealed your painted toilet seat cover, it’s time to move onto reattaching it properly without causing any damage or scratches in the paint job!
Reattaching the Toilet Seat Cover
Attaching the newly painted toilet seat can be tricky, but with these tips, you’ll ensure it’s done correctly without causing damage to your hard work. First, when reattaching the seat cover, make sure you use the same screw types and tightening methods that were used before.
If you notice any rust on the screws or hinges, it’s best to replace them with new ones to prevent further damage. If you want to add decorative accents to your toilet seat cover, consider using stencils or color matching techniques. You can also apply a clear coat option for added protection and durability.
Upcycling ideas are also great ways to give an old toilet seat a new life. Once the seat is securely attached, move onto maintenance and care tips for your painted toilet seat cover.
Maintenance and Care Tips for Your Painted Toilet Seat Cover
Maintaining and caring for a newly painted toilet seat requires proper cleaning with non-abrasive cleaners and avoiding harsh chemicals that could damage the paint. Here are some tips to help you keep your painted toilet seat looking fresh:
- Clean your painted toilet seat regularly with a soft cloth and mild soap to prevent dirt buildup and discoloration. Avoid using abrasive sponges or scrubbers on your painted toilet seat, as they can scratch the surface.
- Don’t place heavy objects on your painted toilet seat, as this can cause dents or scratches. If you do notice scratches or chips, touch up those areas with matching paint. Keep some extra paint on hand just in case.
- Make sure your bathroom is well ventilated to reduce humidity levels, which can cause peeling or fading of the paint over time. Allow sufficient drying time between coats of primer and topcoat for optimal adhesion and durability.
- Apply thin coats of primer and topcoat to avoid drips or runs. Too much paint can also lead to cracking or chipping. Properly prepare the surface by cleaning, sanding, and priming before painting for best results.
- Consider applying a clear coat protective finish over the topcoat for added protection against wear and tear.
By following these maintenance tips, you can extend the life of your painted toilet seat cover while keeping it looking clean and vibrant. Don’t forget to choose a color that complements your bathroom decor!
Conclusion
Congratulations! You’ve successfully transformed your bathroom’s look without spending a fortune by painting your toilet seat cover. You’re now the proud owner of a unique and stylish toilet seat that’s sure to impress your guests.
But it doesn’t stop there – you can take this newfound skill and apply it to other areas of your home. Imagine the possibilities: painted picture frames, decorative trays, and even furniture pieces!
The sky’s the limit when it comes to DIY projects, and with a little creativity and patience, you can turn any mundane item into a work of art. So go forth and paint! Who knows what kind of masterpiece you’ll create next?

Hey there, I’m Alex Hanson and I’m passionate about all things covers! Whether you’re looking for a car seat cover to protect your vehicle or an oven cover to keep your kitchen clean, I’m here to help. With years of experience in the industry, I have plenty of knowledge and insights to share with my readers. So, if you care about protecting your belongings and making them look their best, you’re encouraged to read my blog as I explore the perfect cover for every need.