Fix Your Shower Curtain Rail Easily – Quick Guide
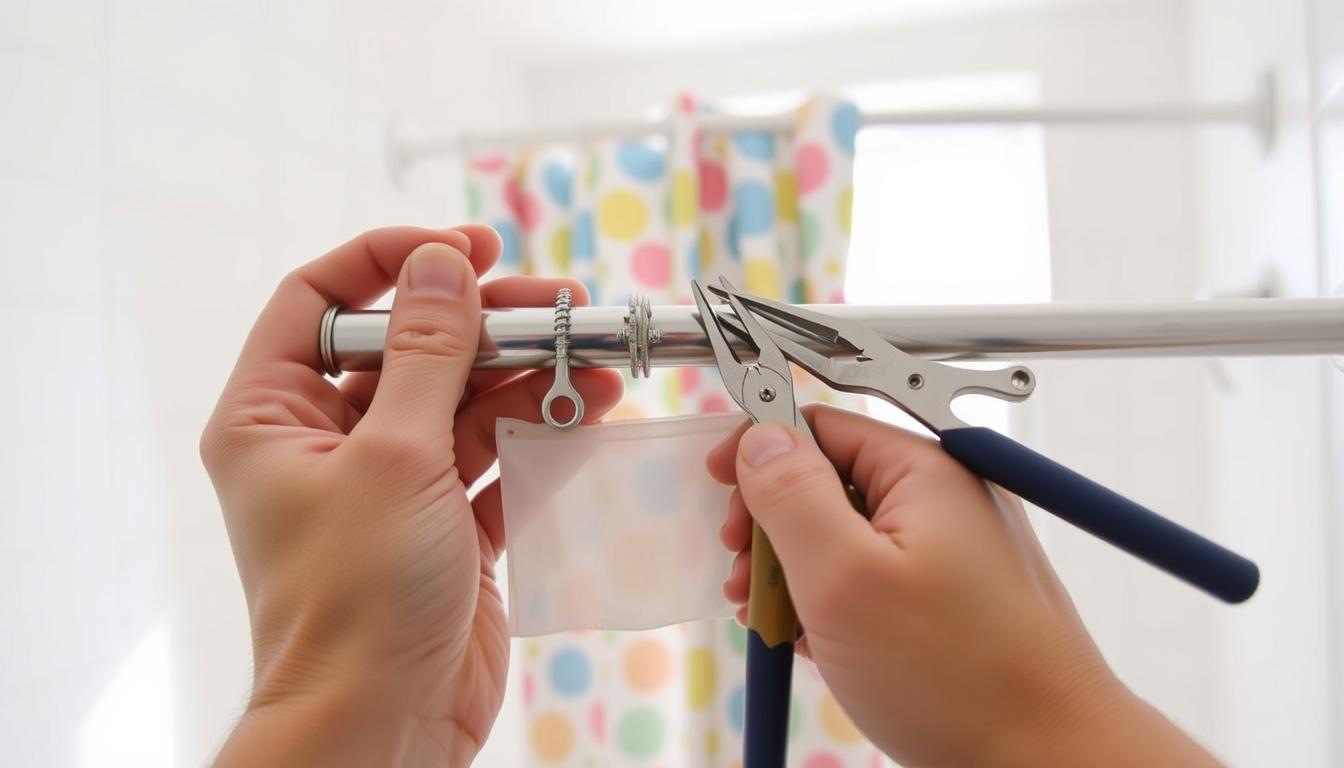
Fixing a shower curtain rail can be simple for anyone with a good guide. It doesn’t matter if it’s for a tub/shower combo or just a shower. This guide will show you how to fix shower curtain rail the right way. You won’t need to call a pro.
For a successful DIY shower curtain rail repair, know the differences between rod types. Permanent, tension, and curved rods each require different setup steps. This guide covers the tools you need and how to install rods in both tile and drywall.
We aim to give homeowners the skills to fix and install curtain rails properly. Setting the correct height and distance from the tub is key for looks and use. With this guide, you’re ready to fix any repair shower curtain rod rail and get great results. Let’s start!
Understanding Different Types of Shower Curtain Rails
Choosing the right shower curtain rail is important for your bathroom. Different types bring unique benefits depending on your needs. Whether you need a shower curtain rod fix, a shower curtain pole repair, or a shower curtain track fix, knowing your options is key.
Permanent Shower Curtain Rod
Permanent shower curtain rods are strong and don’t move. Once installed, they stay put to avoid any mishaps. They use anchors and screws for a secure installation. This makes them great for a lasting solution.
It’s a good choice if you want something reliable over a quick fix. Make sure to use a drill and measuring tape to install it right.
Tension Shower Curtain Rod
Tension shower curtain rods are easy to set up and adjust. They work great on tiles or stainless steel without drilling. A tension rod stays up by pressing against the walls.
But, they might not hold heavy curtains well because they depend on tension. They’re perfect for renters or for those who like to change things up.
Curved Shower Curtain Rod
Curved shower curtain rods curve out, giving you more space in the shower. This stops the curtain from sticking to you. They look stylish and are fixed with screws for a strong hold.
Curved rods make your shower feel bigger and more luxurious. They improve your shower by adding more space.
Knowing the different shower curtain rails helps you choose the best one. Permanent rods are durable, tension rods are flexible, and curved rods add beauty and space. Pick what works best for your bathroom for a great update.
What Tools and Materials You Will Need
Before fixing your shower curtain rail, having the right tools and materials is key. Whether fixing a loose rail or installing a new one, here’s a list to help you.
Essential Tools for the Job
Here are the must-have tools for repairing a shower curtain rail:
- Power drill
- Suitable drill bits
- Screws
- Measuring tape
- Safety glasses
These tools help you work precisely and safely. They lower the chance of damaging tiles or drywall.
Materials Needed for Repair
You’ll need certain materials for a successful fix or installation:
- Shower rod
- Wall anchors
- Additional screws (if supplied by manufacturer)
Ironmongery Experts offer bendable shower rails that include wall brackets, nylon hooks, and gliders. This ensures your project runs smoothly and you have everything you need.
Optional Tools for Better Efficiency
For better efficiency and accuracy, consider these optional tools:
- Stud finder
- Level
- Mason drill bit (for drilling into tile)
These tools can speed up the process and add stability, especially with loose shower curtain rails. Safety is key in DIY projects. Consulting a professional ensures you’re using the right methods and following safety guidelines.
Let’s review the tools and materials needed:
| Item | Details |
|---|---|
| Power Drill | For drilling holes in tiles or drywall |
| Suitable Drill Bits | Compatible with the material you’re drilling into |
| Screws | Necessary for fixing the shower rod |
| Measuring Tape | For accurate measurement |
| Safety Glasses | Protecting eyes during drilling |
| Shower Rod | Primary material of repair |
| Wall Anchors | Provides support when fixing the rail |
| Additional Screws | Supplied by the manufacturer |
| Stud Finder | Optional for added accuracy |
| Level | Ensures the rod is straight |
| Mason Drill Bit | Optional for drilling into tiles |
Keep this guide handy as you plan and carry out your shower curtain rail repair. Being prepared makes the job easier and safer.
How to Fix Shower Curtain Rail on Tile and Drywall
Knowing how to fix a shower curtain rail on tile and drywall is crucial. The approach differs based on the surface. Ensure you have the necessary tools and materials before starting.
Fixing on Tile
Be careful when mounting a shower curtain rod on tile to avoid damaging it. A tension rod is a good choice because it doesn’t require drilling. For a fixed rod, here are the steps:
- Drill Bits: Choose a special tile drill bit to avoid cracking the tiles.
- Precise Measurements: Mark the drilling points carefully, ensuring they’re symmetrical.
- Wall Anchors: Use wall anchors in the holes for extra screw support.
- Installation: Fix the brackets with screws, making sure they’re tight and even.
To install a tension rod, adjust its length and twist until secure. This avoids tile damage.
Fixing on Drywall
For fixing on drywall, follow these steps for a firm hold:
- Stud Finder: Find the wall studs with a stud finder for solid support.
- Wall Anchors: Without studs, use strong wall anchors for the shower rod.
- Drill Holes: Mark and drill at the right height, with the curtain slightly off the ground.
- Secure Brackets: Put in the wall anchors and screw the brackets tightly.
- Placement: Position the rod in the brackets securely.
Installing a shower curtain rod on drywall might need two people. This ensures it’s done correctly and stays stable. Especially with permanent rods.
Fixing a shower curtain rail on tile or drywall requires careful steps. This ensures a secure and lasting mount. Always measure correctly and choose suitable materials for a top-quality job.
Step-by-Step Guide to Installing a Tension Shower Curtain Rod
Putting up a tension shower curtain rod is simple. You don’t need many tools or to drill holes in your walls. It’s perfect for tile and lets you easily hang a curtain and liner. Here’s how you can do it without trouble.
Measuring and Marking the Wall
Start by checking the height of your shower curtain. Most curtains are 74 inches square. For proper coverage, let it hang about 5 inches below the tub’s edge. Add about 4 inches to this for where the rod should go.
Then, measure the right height on the shower’s walls. Use a pencil to mark it. Make sure your marks are even for a straight rod.
Installing the Tension Rod
With your marks made, it’s time to fit the rod. Tension rods can be made longer by turning them. Expand it until it’s just a bit more than the space’s length. Fit it snugly between your marks.
To secure it, twist the rod until it’s tight. It needs to hold up both the curtain and liner. Pull on it gently to check it’s secure. Setting this up is quick, taking less than 5 minutes.
Now, attach the curtain hooks to your curtain and liner. You’ll usually have 12 hooks. Then, hang them on the rod. Adjust the rod to make sure it’s both straight and secure.
This is a great way to fix up your shower without making permanent changes. For more information on installing a curtain rod, click here.
Instructions for Installing a Permanent Shower Curtain Rod
Installing a permanent shower curtain rod needs accuracy and the right tools. It’s helpful to have someone help you during the installation. This makes sure the rod stays up well, especially on drywall using wall anchors.
First, measure where you want the rod, usually 78 inches high. This height works well with a standard 72″ x 72″ shower curtain. It helps keep water in the shower and lowers the chance of mold. Mark where you’ll put the rod, using a stud finder or wall anchors if there are no studs.
- Drill three holes on each side where you marked for the rod. If you’re drilling into tiles, put painter’s tape first to prevent cracks. Try drilling at grout lines.
- Put in the wall anchors or screws that came with the rod.
- Line up the rod with the holes and attach it with brackets. Make sure it’s tight to keep the rod stable.
- Hide the screw brackets to keep things looking nice.
If you want something easier, consider a tension rod. But, it’s not as strong as a fixed rod and might hurt the drywall if not used right.
For more help, check out this complete guide on how to set up a shower curtain. It gives tips for a solid and correct installation.
Buying your shower rod online, like on Amazon, gets you fast shipping with Amazon Prime. This helps finish your project quickly. After putting up the rod, check your shower curtain rings to make sure everything works well.
Below is a table comparing different shower curtain rods:
| Rod Type | Installation Difficulty | Advantages | Disadvantages |
|---|---|---|---|
| Permanent Shower Curtain Rod | Challenging | Stability, Durability | Requires drilling, professional help recommended |
| Tension Shower Curtain Rod | Easy | Quick installation, no drilling | Less stable, potential to damage drywall |
| Curved Shower Curtain Rod | Moderate | Extra room in shower | Requires precise installation |
Common Issues and How to Fix Loose Shower Curtain Rail
A loose shower curtain rail can be annoying. Thankfully, it’s usually an easy fix. Whether it involves a tension rod or a permanent one, figuring out why and fixing it can quickly make your bathroom better. Let’s look at the best ways to fix a shower curtain rail.
Tightening a Loose Rod
Fixing a loose rod can be easy. You can twist a tension rod so it fits tightly or secure any screws on mounted brackets. Tension rods can need a lot of adjusting over time. People often have issues with tension rods falling down. If your tension rod keeps falling, think about using adhesive tension rod holders. They cost about $7 and are simple to put in place. You just remove the paper and stick them where needed. They come in two sizes, so make sure to get the right one for your rod.
Replacing Wall Anchors
Over time, wall anchors can get weak and make your shower curtain rail unstable. To fix your shower curtain rail well, you might need to replace old or broken wall anchors. Strong options like SNAPTOGGLE Heavy-Duty Toggle Bolts work best. For the best support, especially with heavy curtains, installing rods into wall studs is good. Durable cotton curtains need to be mounted well to avoid damage. People also suggest using different bolts, such as toggle and lag bolts, for a stronger hold. Putting wood bracing behind the drywall to strengthen where you attach things is another useful idea.
Using Additional Brackets for Stability
Sometimes, even with everything tightened and new anchors, you might need more support. Extra brackets can make your shower curtain rail more stable. They help spread the weight of the curtain, easing pressure on any one spot. For example, curved rods, which can be expensive, really benefit from more brackets. Adding brackets makes everything more stable and cuts down on future problems. People have found that nylon spacers used with brackets can make things even stronger. This is great if you like heavier or fancier curtains.
By using these ideas, you can fix a loose shower curtain rail well. For even more tips, including how to fix other bathroom items, check out this resource.
Where to Buy High-Quality Shower Curtain Rails
It’s important to buy high-quality shower curtain rails to make your bathroom last longer and work better. There are many good places to find the right shower curtain rod for you. For instance, Amazon has a wide selection and fast delivery, which is very handy.
If you need something more specific, BuyRailings.com is a great choice. They offer a variety of rods and kits for any need. Shopping at a specialized store means you’re getting better quality and materials that last.
Choosing a trusted source means you’ll get long-lasting, high-quality shower curtain rails that match your bathroom’s look and function. Whether you’re looking online or at specialty stores, there are many options to explore. This way, you can find the perfect shower curtain rod for your bathroom.

Hey there, I’m Alex Hanson and I’m passionate about all things covers! Whether you’re looking for a car seat cover to protect your vehicle or an oven cover to keep your kitchen clean, I’m here to help. With years of experience in the industry, I have plenty of knowledge and insights to share with my readers. So, if you care about protecting your belongings and making them look their best, you’re encouraged to read my blog as I explore the perfect cover for every need.


